
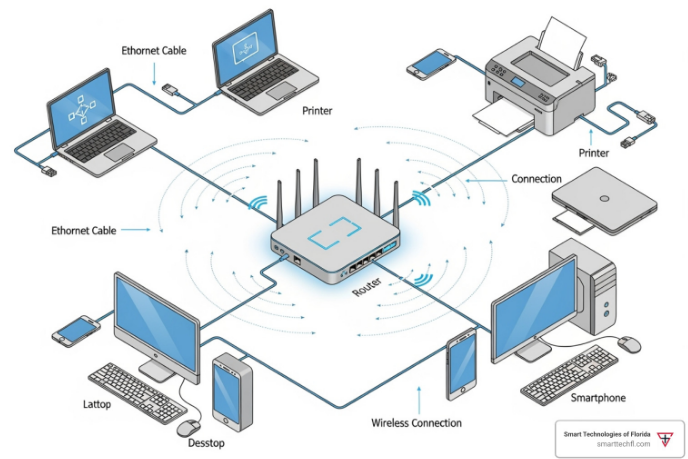
Setting up a new printer should be a simple process, but many users encounter issues during installation or while connecting their printer to a computer or mobile device. Whether you’re using a wireless inkjet printer, a laser printer for the office, or an all-in-one multifunction printer, following the correct setup steps can save time and prevent common connection problems.
This comprehensive printer setup & connection guide walks you through everything you need to know—from unboxing your printer to printing your first document.
Before You Begin Printer Setup
Before installing your printer, make sure you have everything you need.
Checklist
- Printer and power cable
- Ink cartridges or toner
- Printer paper
- USB cable (if using a wired connection)
- Wi-Fi network name (SSID)
- Wi-Fi password
- Computer, laptop, smartphone, or tablet
- Internet connection (recommended)
Having these items ready will make the installation process smoother.
Step 1: Unbox and Prepare the Printer
Start by carefully unpacking your printer.
Remove:
- Protective tape
- Foam inserts
- Plastic packaging
- Shipping locks
Next:
- Connect the power cable.
- Turn on the printer.
- Select your preferred language and region if prompted.
Allow the printer to complete its initial startup.
Step 2: Install Ink or Toner
Most new printers require cartridge installation before they can be used.
To install:
- Open the printer cover.
- Insert the ink cartridges or toner into the correct slots.
- Close the cover securely.
- Wait while the printer initializes the cartridges.
Some printers may also perform an automatic printhead alignment.
Step 3: Load Paper
Insert clean printer paper into the input tray.
Adjust the paper guides so they fit snugly against the paper stack without bending it.
Using the correct paper size helps avoid paper jams and print alignment issues.
Choose Your Connection Method
Most printers support multiple connection options.
Available Connection Types
- Wi-Fi
- USB
- Ethernet
- Bluetooth (select models)
- Wi-Fi Direct
Each method has different advantages depending on your needs.
Connect Your Printer via Wi-Fi
Wireless printing is the most convenient option for homes and small offices.
Steps
- Open the printer’s wireless settings.
- Select Wi-Fi Setup Wizard.
- Choose your wireless network.
- Enter your Wi-Fi password.
- Wait until the printer connects.
A solid wireless indicator usually means the connection was successful.
Connect Your Printer via USB
USB offers a stable and reliable connection.
Installation Steps
- Turn on the printer.
- Connect the USB cable.
- Wait for your computer to detect the printer.
- Install drivers if prompted.
- Print a test page.
Avoid connecting through unpowered USB hubs, as they may cause detection issues.
Connect Using Ethernet
For office environments, Ethernet provides fast and reliable networking.
Steps
- Connect an Ethernet cable to the printer.
- Connect the other end to your router or network switch.
- Turn on the printer.
- Add the printer from your computer’s printer settings.
This method is ideal for shared office printers.
Connect Using Bluetooth
Some compact printers support Bluetooth connectivity.
To connect:
- Enable Bluetooth on the printer.
- Turn on Bluetooth on your device.
- Pair the printer.
- Install the manufacturer’s printing app if required.
Bluetooth works best for short-distance printing.
Install Printer Drivers
Drivers allow your operating system to communicate with the printer.
Windows
- Open Settings.
- Select Bluetooth & devices.
- Click Printers & Scanners.
- Choose Add device.
- Follow the installation wizard.
Windows often installs drivers automatically.
macOS
- Open System Settings.
- Select Printers & Scanners.
- Click the + button.
- Select your printer.
- Install the recommended driver.
macOS supports many printers without requiring additional software.
Set Up Printing on Mobile Devices
Modern printers support printing from smartphones and tablets.
Android
- Connect to the same Wi-Fi network.
- Install the printer manufacturer’s app.
- Print directly from supported apps.
iPhone and iPad
Many printers support AirPrint.
Simply:
- Open the document.
- Tap Share.
- Select Print.
- Choose your printer.
No extra driver installation is needed for AirPrint-compatible printers.
Print Your First Test Page
Once setup is complete:
- Open any document.
- Select Print.
- Choose your printer.
- Click Print.
Verify:
- Text is clear.
- Colors print correctly.
- No paper jams occur.
- The printer responds quickly.
A successful test page confirms that your printer is ready to use.
Common Printer Setup Problems
Even new printers may experience setup issues.
Printer Not Detected
Possible causes:
- Loose USB cable
- Wrong Wi-Fi network
- Driver not installed
- Firewall interference
Solutions
- Restart both devices.
- Reconnect the cable.
- Reinstall drivers.
- Check your network connection.
Cannot Connect to Wi-Fi
Possible reasons include the following:
- Incorrect password
- Weak signal
- Unsupported network frequency
- Router issues
Try moving the printer closer to the router and reconnecting.
Printer Shows Offline
If your printer appears offline:
- Restart the printer.
- Restart your computer.
- Set the printer as the default device.
- Disable “Use Printer Offline” in printer settings.
Driver Installation Failed
If installation fails:
- Download the latest driver from the manufacturer’s website.
- Restart your computer.
- Run the installer as an administrator.
- Disconnect and reconnect the printer.
Update Printer Firmware
Firmware updates improve:
- Stability
- Security
- Wireless performance
- Compatibility with new operating systems
Check the manufacturer’s support page periodically for updates.
Tips for a Smooth Printer Setup
Follow these best practices:
- Keep your printer close to the Wi-Fi router during setup.
- Use the latest printer drivers.
- Keep your operating system updated.
- Install genuine ink or toner cartridges.
- Print a test page after installation.
- Update firmware regularly.
- Use high-quality paper to reduce jams.
- Save your printer manual for future reference.
These simple habits help ensure reliable performance over time.
Frequently Asked Questions
How long does printer setup take?
Most printers can be fully set up in 10–20 minutes, depending on the connection method and driver installation.
Can I set up a printer without a computer?
Yes. Many modern printers can be configured directly from a smartphone using the manufacturer’s mobile app.
Why can’t my computer find my printer?
Ensure both devices are connected to the same Wi-Fi network, the printer is powered on, and the correct drivers are installed.
Is USB or Wi-Fi better?
USB provides a stable, direct connection for a single computer, while Wi-Fi allows multiple devices to print without cables.
Do I need to install printer software?
Many operating systems install basic drivers automatically, but the manufacturer’s software often provides additional features such as scanning, maintenance tools, and firmware updates.
Conclusion
Setting up and connecting a printer doesn’t have to be difficult. By following the correct installation steps, choosing the right connection method, and keeping your drivers and firmware up to date, you can enjoy reliable printing from your computer or mobile devices. Whether you use Wi-Fi, USB, Ethernet, or Bluetooth, a proper printer setup & connection process ensures smooth performance and fewer troubleshooting headaches in the future.